Monday, April 19, 2021

Island Project Week 02

 Island Project Week 02 — Crab (High Res)

    This week I worked on making the crab appear more "cute" and "friendly" to the player! We started out with a much more realistic looking crab, but I narrowed down what traits made crabs look cute. What I found in my research was that crabs with big eyes that were mostly black were adorable, and crabs with small faces were adorable. I was able to find lots of things that did not look cute on a crab. Super pointy legs made them look too spider-like, any kind of open-mouth looked weird on most of them. Eyes that had color and whites looked strange and too much like people eyes. I found that mostly rounded shapes looked best, while keeping away from any sharp pointed edges. I then worked on moving the sculpt in this direction, and think I did so pretty well!

I did not get this version of the crab in engine yet, but it will be in engine soon. A lot of my time was worn away because this break I got major surgery to have my gallblader removed. Monday (today) was my first day actually back working, but I'm finding some major pain if I sit at my desktop propping my upper body up for too long. Hopefully this week as I recover more I'll be able to really put in some hours!


Monday, April 5, 2021

Island Project Week 01

Island Project Week 01 - Crab

   For the first week of this project, I focused on collecting references to use for the crab as well as beginning to build upon the sculpt that Nick had already created. Since we are going with Orb's style (which is inherently Blizzard's style because that's who he works for) I decided to pull what I could for stylized references of crabs from World of Warcraft. I then did some digging to try and find crabs that fit with the geometry already created. Using the Ghost Crab reference that was given as a starting off point, I also found a similarly shaped Galapagos Painted Ghost Crab that had a coloring similar to what I believe the crabs should be at the end of the project. They also had more defined eyes which appeared to be more inline with the original concept. 

I then began editing the sculpt that was already provided by Nick. I added the definition to the legs, to the top and bottom of the body, as well as to the claws and the eyes / face. I tried to develop some separation where the leg joints met one another so that it would be easier to tell they were separations in the future utilizing Folygon's Cloth Fold brush.


Sunday, April 4, 2021

Sprint 6

 This week I worked on getting the transitional effect set up properly. The original slide from right to left of crows came across too cheaply. I instead decided to use a hand-drawn sprite sheet placed into a flipbook material to try and get that to render onto the post processing effect on command instead.

I ran into several issues with it. The first was getting it to show up at all, which was solved by a multiply node with the Post Processing 0 node. The second was getting the flipbook to render at the right scale. This was solved by ensuring that the rows and columns were set properly. The third was ensuring that it could be played on command as opposed to just continuously playing. The solution that I currently have set up for that is a IF statement that checks to see if two numbers are equal to each other. Then, within the blueprint I manually change that variable to ensure they are equal to each other when I want it to play.


Currently the effect plays twice, I'm doing this so that we have approximately how long it will take for the effect to play without me hand-animating all 20 of the frames without testing. This is a test that I will expand upon as I finish hand-drawing the animations for this flipbook now that I know it works within the engine.

Here are the two parts to the Blueprint I created to trigger the level transition:


On begin play I get the post processing, create a variable with it, set it to unbound, create a material instance of the material inside of the post processing material, and set the scalar parameter within that material instance called "ifZerothenPlay" to -1.


For this second half, I am first checking to make sure that the object overlapping the trigger box is the hands of the player. Then in a sequence, it does the following: 1. Get the material instance parameter of "ifZerothenPlay" and changes that to 0 in order to begin the flipbook animation. Then there is a delay so that the animation can play, before it is once again set to 1 to turn it off. 2. Get the current player camera and start a fade on it to black, with a slight delay. Then the level designated will open.

I plan to finalize the last 7 frames of the animation so that it is complete for a first pass in the following weeks. As a reminder written here: I will be having surgery to remove my gallbladder shortly and will know tomorrow (Monday) when that will be happening. It'll likely be in a few days / a week. My next turn it may have less work as a result of this.


Sunday, March 21, 2021

Corpse Bride Check In

 Corpse Bride Check In

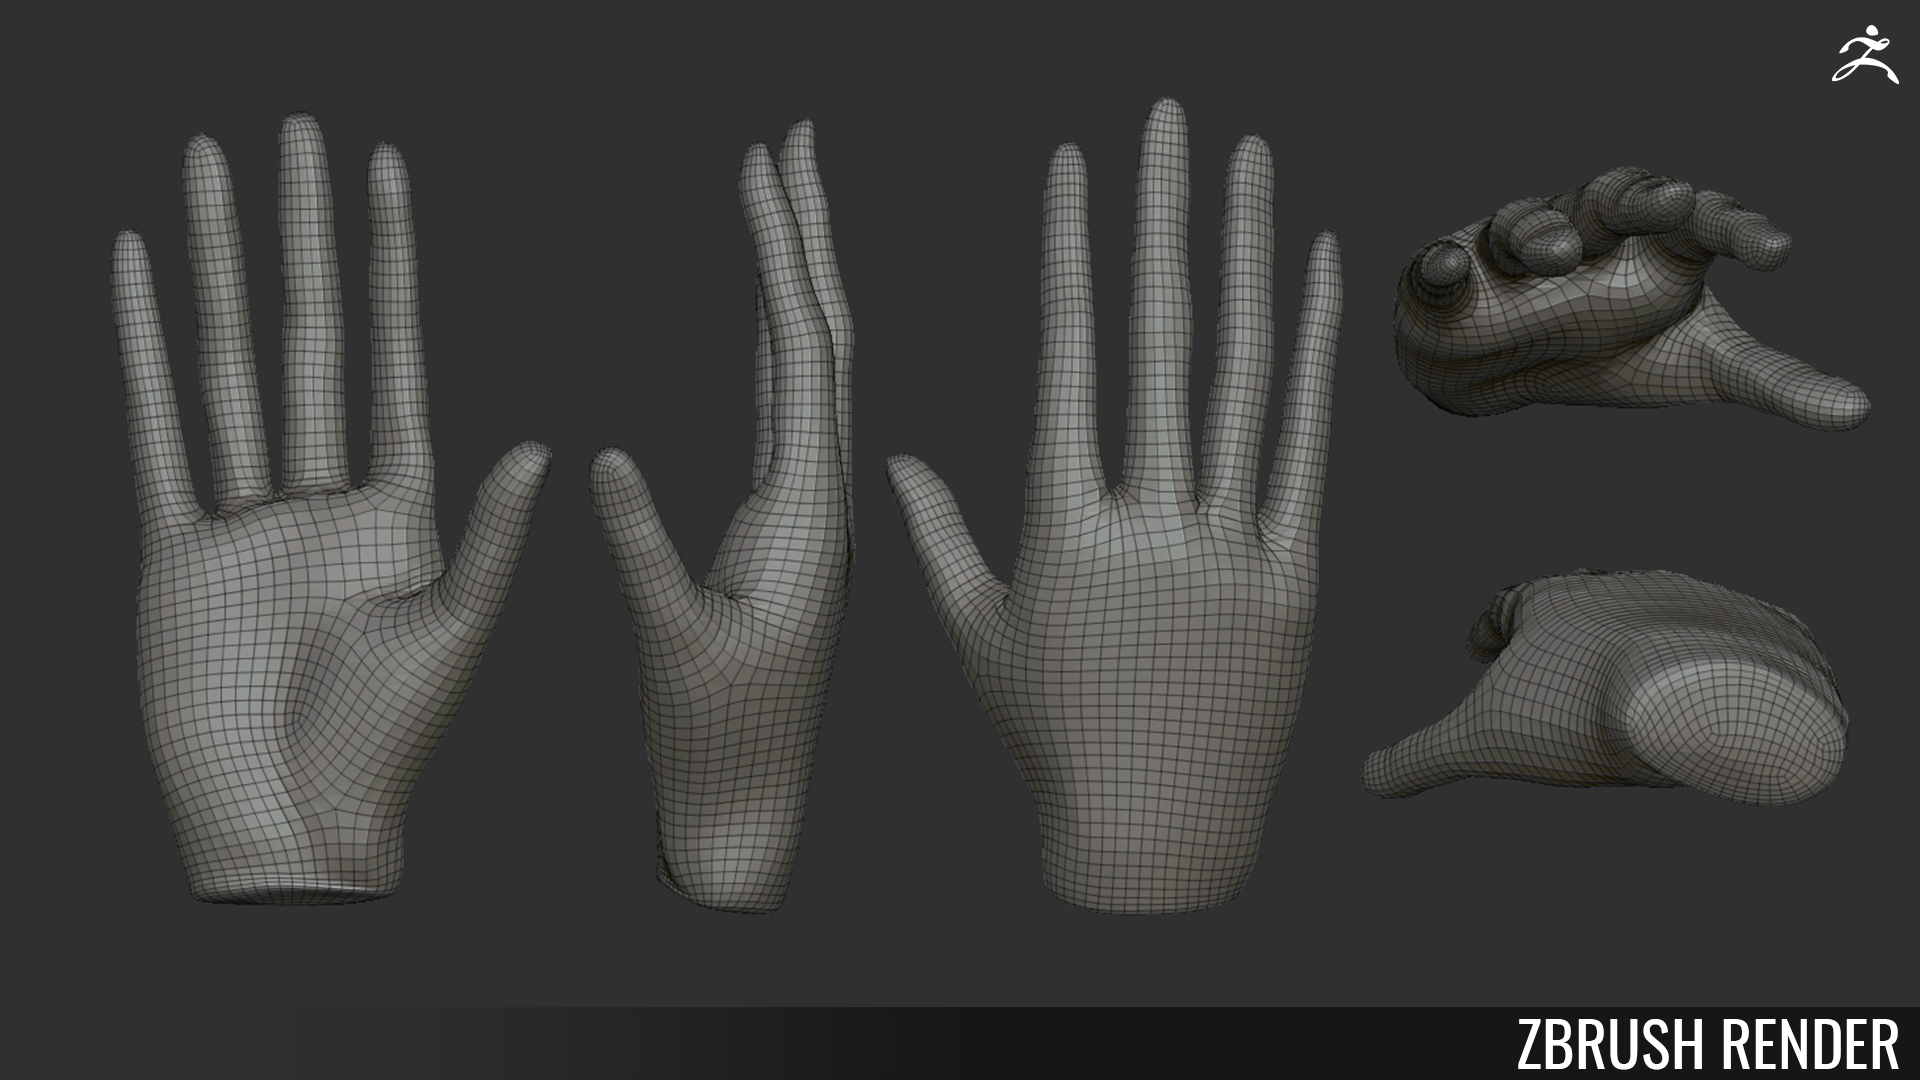
    This week I mostly worked on the hands that are going to replace the default UE4 mannequin hands. I sculpted them in ZBrush to match the UE4 mannequin hands with only slight elongation of the fingers to showcase how spindly Victor's fingers are. I then decimated the hand in Zbrush using the Decimation Master tool, followed by the ZRemesher tool to make sure that the polygons moved in a natural way around the hands for skinning purposes. After Franco put the bones in the hand, I weight-painted the bones to properly skin them to the fingers.


I also worked on getting a proxy rendition of the "Crow Effect" that we want for our level transitions. I learned about how Post Processing Materials can effect cameras and how to set up a panning material that can be edited remotely in a blueprint. However, this effect is currently not working to my knowledge. I do not have a headset so this was very difficult to test, and I'm not sure that I was testing the right things. Here is what I did accomplish with that, however.


This is the texture that I made to test the material. The white part shows up as the actual game, whereas the black shows up as a masked black in the camera viewport. I tied this to the texture coordinates and was able to directly edit how much of the screen was covered by this effect in the post processing material.


Abi had already set up the trigger for the level to swap, so all I had to do was add this to the BP that already existed. I added a post processing component to the BP and then used the following blueprints to have the effect work on overlap with the player's hands.


Currently, I am not sure if the blueprint functions because the prior blueprint was set up to fade to black, and even with just that blueprint I couldn't see the fade. I may be looking at the wrong camera to test this.